
Installation Guide: How To Install SSD?
Installing an external Solid-S6 tate Drive (SSD) to your Personal computer (PC) is one of the easiest ways to improve your PC storage wise and speediest PCs are likely to boost and run quicker when an SSD is installed. There are other benefits as well. Applications usually tend to load faster, the PC becomes generally more responsive than earlier and most importantly, an SSD can be installed in both desktops and laptops.
The process of installing an SSD card is not a difficult one. To help you with it, we have given a fully elaborative guide on how to install an SSD to your Check it out!!
Prep
Before installing an SSD there are few things that you should be mindful about. Just follow these simple steps.
Step one: Selecting an SSD
When purchasing an SSD, considering your budget and the requirement is the first thing you should do. But there are other things you should consider as well.
Hard drive or SSD? or both?– If you want your PC to run faster, applications to load quicker and respond quicker, then you should definitely think of buying an SSD. But if storage is your biggest concern, go for a hard drive. For better performance and storage, you can install a hard drive and an SSD cause most PCs we have today have that option.
How about the Size? – Consider the physical size of your computer before purchasing an SSD. Most of the desktops have enough room for one or two SSDs. If you are buying an SSD for your laptop, make sure you properly check the available space prior to the purchase.
How much storage do I need? – that’s pretty easy to decide. More storage is more money. So, whatever fits your budget will do.
Step two: Back up/ transfer your files
When installing an SSD or a new hard drive make sure you have your important data backed up or transferred to another external device. This way you can reduce the risk of losing important files.
Step three: Install your drive
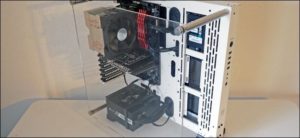
How to install an SSD to a desktop
Things required
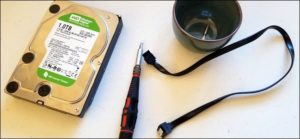
- A Phillips head screwdriver
- SATA cable
- New screws if you haven’t saved the ones that came with the box
Steps to follow
Precautions: Make the environment static free. Remove all plastic and paper from your work area. Using an anti-static bracelet is also another precaution that can be taken.
- Power down your machine and remove all the cables.
- Take the device in to the working are. (This area should be cool and dry and preferably without a carpet floor)
- Put the device upright in a perfectly accessible angle.
- Remove the access panel from the primary side of the case, which is situated on the left side from the case if you have it faced front. (This would require taking off two or three screws from the back)
- If you are working with a conventional desktop you will see the motherboard with a boxy power supply at the top or bottom of the case. And there you will see computer storage drive/drives mounted towards the front of the case with a SATA cable running from the power supply to the drive. (If there’s no visible drive, try removing the opposite panel, cause in some new designs, the drive is placed behind the motherboard)
- Then unplug the data and the power cables from the drive.
- Drives are usually placed on sliding caddies. Remove it from the caddy. Caddies are different from one another and might have different types of screws. It doesn’t matter, remove it all and get the drive out of the caddy.
- Note: Make sure you have small plastic containers to keep the removed screws safe for reassembling.
- Set aside the old drive carefully.
- Take the new drive and reverse the process. (place it on the caddie-crew and slide it in)
- Now plug all the cables to the drive.
- If you are adding a new drive while the existing one remains, then you will have to add new cables and an additional caddy.
- Plug one end of the SATA cable into the back of the drive and one in to the motherboard.
- Then plug the SATA power connection from the power supply to the new drive.
- Make sure the cables are placed away from colliding the cooling fan or heatsinks.
- Replace the access panel.
- Reconnect the PC and you’re good to go.
How to install an SSD to a desktop
Things required
- SSD drive
- Screwdriver
- Laptop’s user manual
Steps to follow
Precautions: Make the environment static free. Remove all plastic and paper from your work area. Using an anti-static bracelet is also another precaution that can be taken.
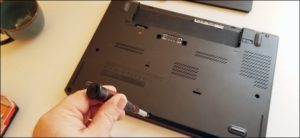
- Shut down the laptop and unplug the power cable.
- Remove the battery.
- Hold down the power button for 3-5 seconds to drain out the residue power.
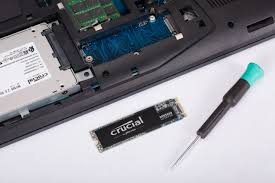
- Check with your user manual and locate the storage bay panel, because that is where the drive is located.
- Be cautious to discharge static electricity when handling the internal component or the SSD.
- Read the laptop instruction manual well to have a clear idea about the screws and cables that are attached to the drive before removing it.
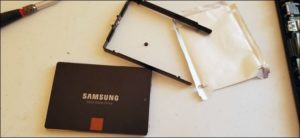
- Remove the current drive.
- Remove all the attached adapters or brackets to it and re-attach them to the new SSD.
- If the new drive doesn’t fit, add a spacer to add more height.
- Align pins of SSD and SATA connector.
- Slide the drive back into the slot. If it doesn’t fit redo the process until it fits. Never force the drive into the slot.
- Reassemble system and reconnect the battery.
- Power on the laptop and enjoy!!